Okta SSO and AWS CLI Setup
This guide explains how to log in to the Okta Single Sign-on (SSO) portal and how to obtain AWS access from your command line. Dataset registration scripts that read from S3 require AWS access, so complete the relevant steps below before running them.
|
You can also watch the walkthrough video: Okta SSO Broker overview (Loom). |
Prerequisites
ACE access relies on Roche Single Sign-on and therefore requires:
-
Active Roche credentials (UNIX ID and password).
-
Membership in one of the authorized Roche Active Directory (RADA) groups.
|
Group access is viewed and managed in CIDM. Before seeking assistance from Techops ACE Infra, log in to CIDM, navigate to Group Management → View Groups, enter your UNIX ID under User Details, and search for your group assignments. If you do not see one of the required SSO groups in your list, you will not be able to access ACE services and ACE Infra will not be able to help you. Request access from your manager via CIDM. |
Okta SSO portal login
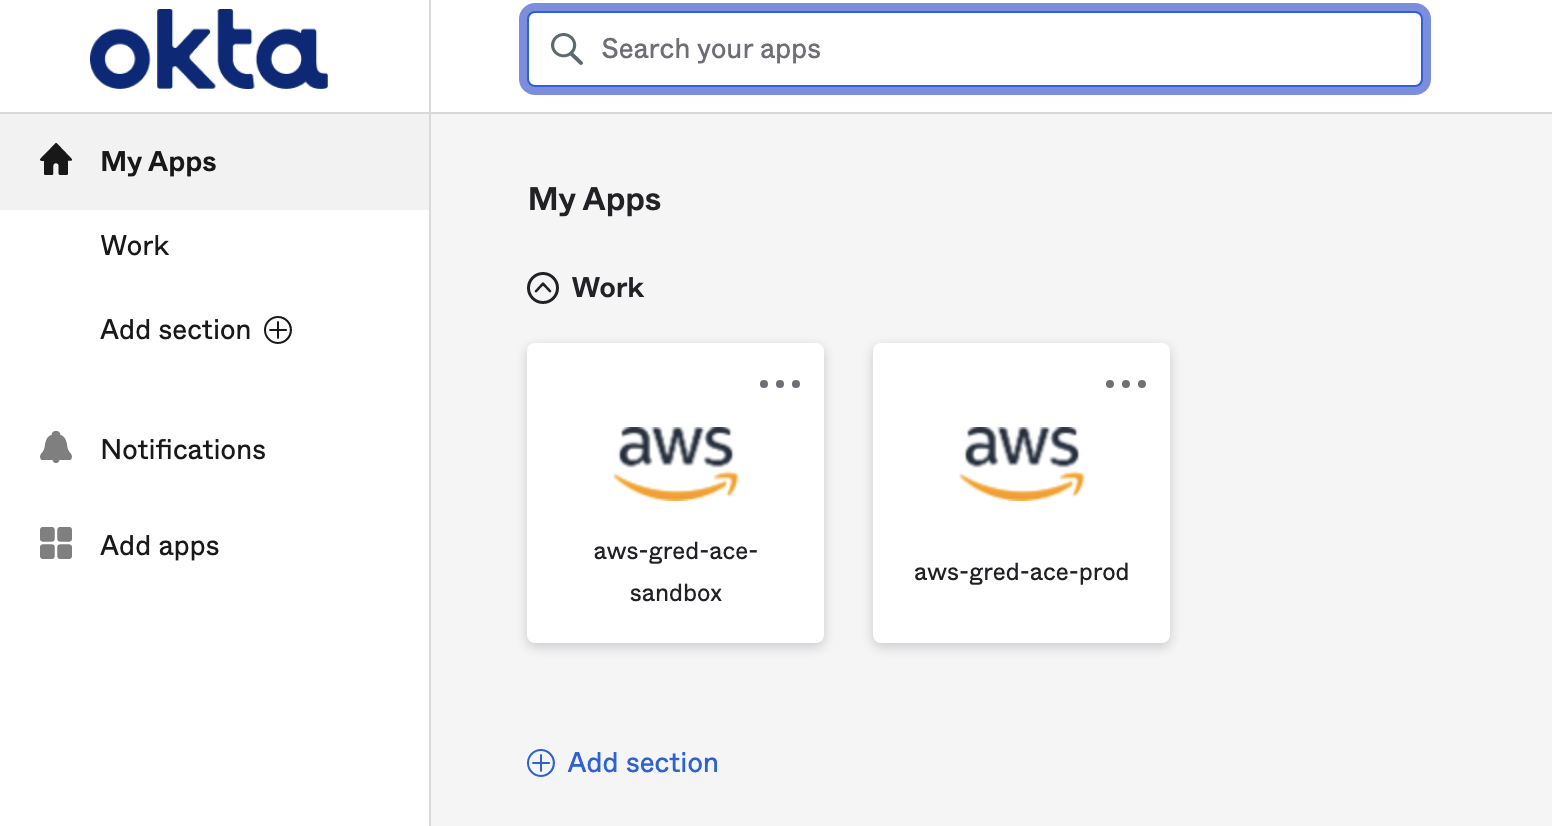
Follow these steps to log in to your Okta SSO portal, where you will be presented with icons representing all of your authorized applications.
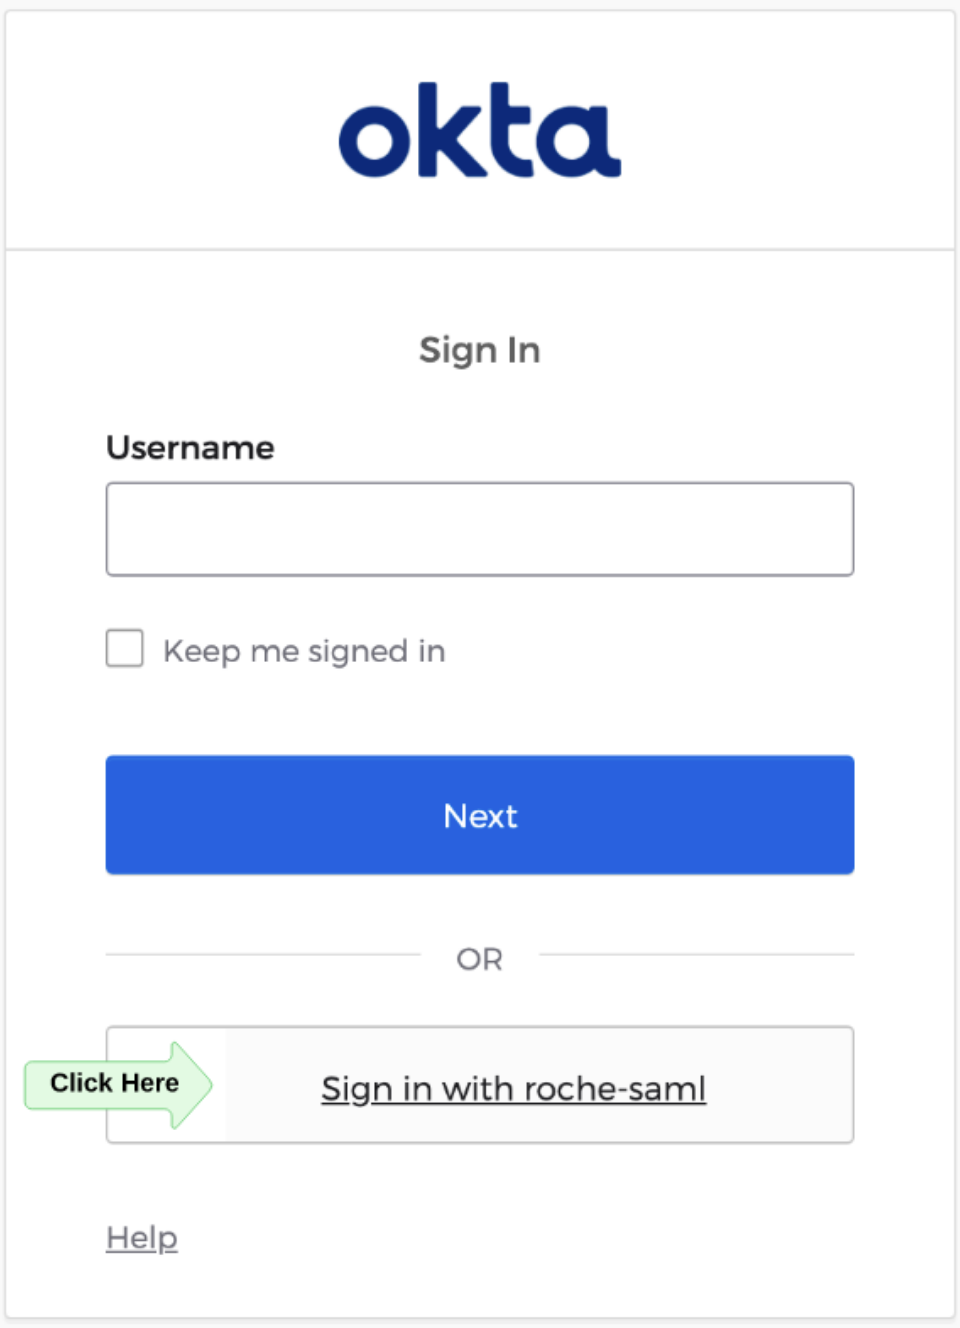
Step 2: Log in with your Roche SSO credentials
Complete the Roche SSO prompt with your UNIX ID and password.
Step 3: Choose your application
Click your desired application from the available list. Okta then launches the application and logs you in automatically.
|
The |
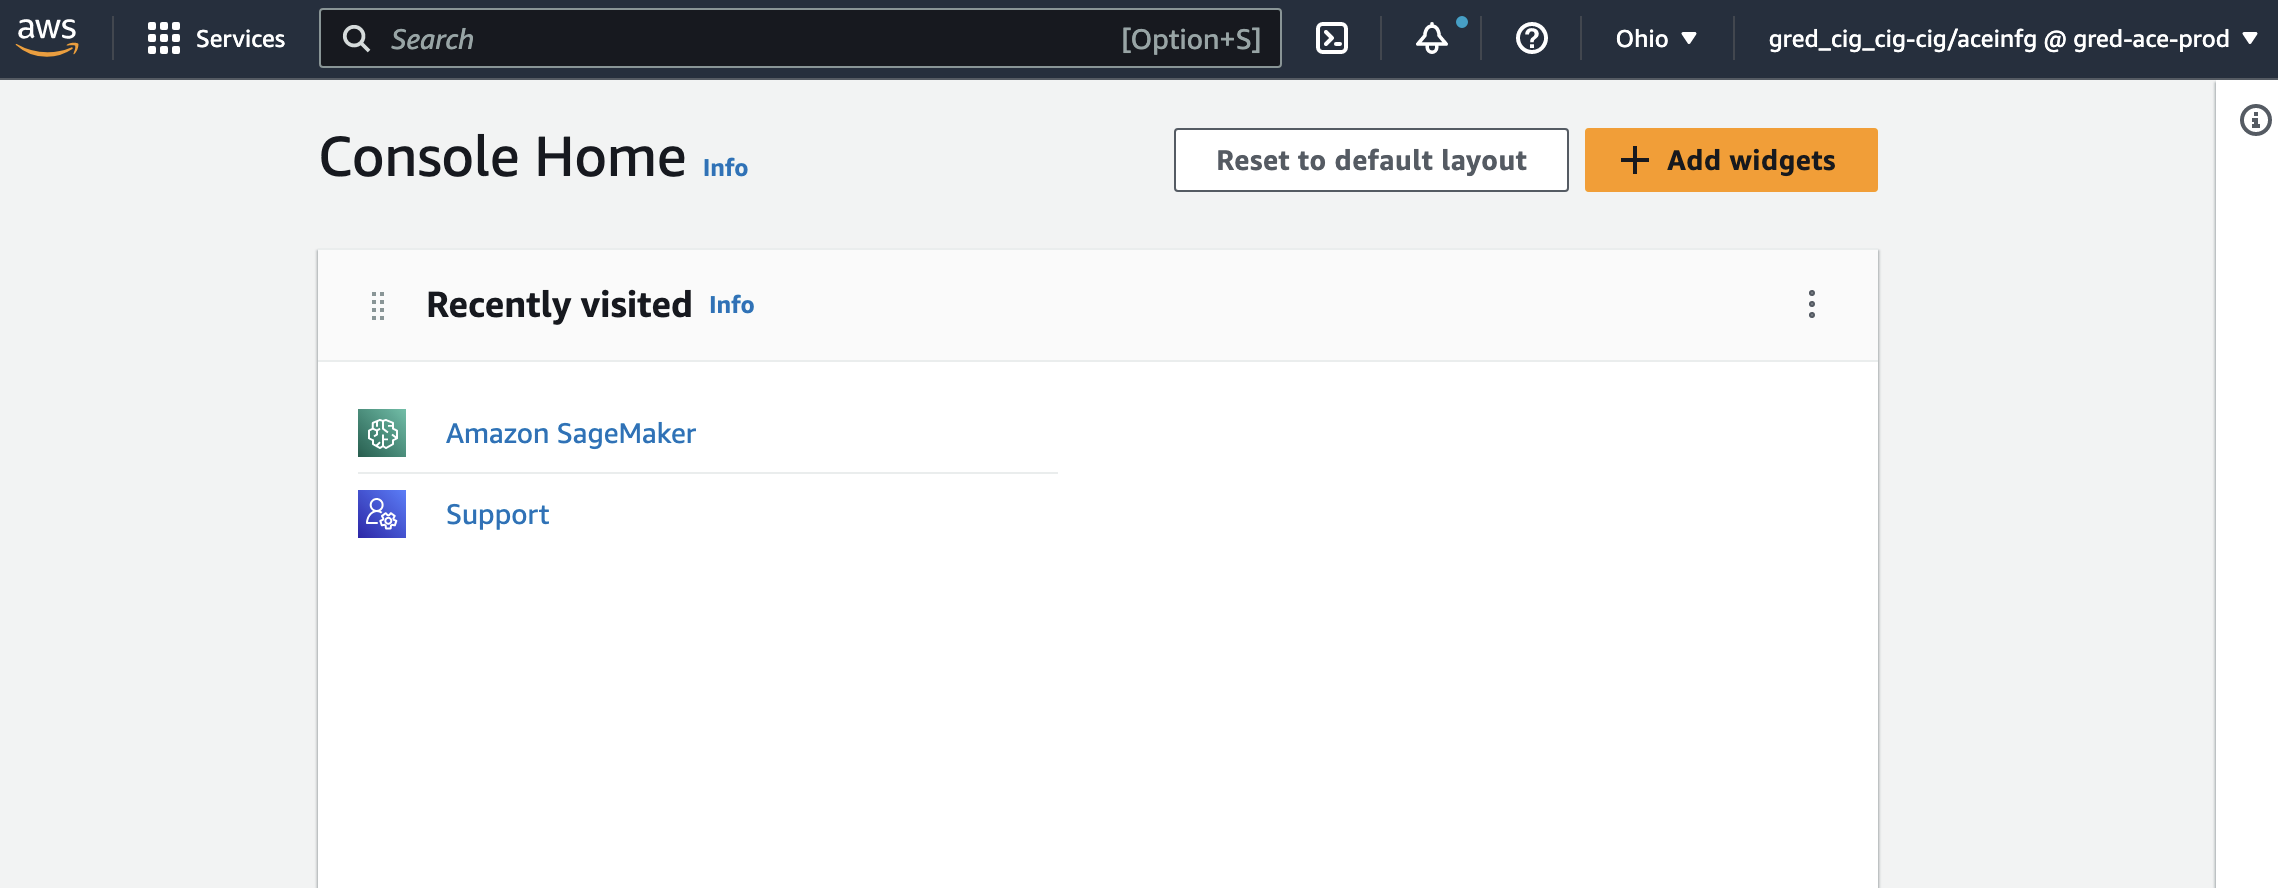
Once launched, you are signed in to the selected AWS account.
|
The top-right corner of your screen shows your identity in the format aws_assumed_role_name/roche_unix_id @ aws_account_alias. Your aws_assumed_role_name should correspond to your assigned team. |

AWS CLI access
For many users, console access is sufficient: follow the portal login steps above, click through to your desired AWS account, and you are set. If you need access from your command line interface, complete the steps below.
Step 1: Install okta-aws-cli
macOS:
brew install okta-aws-cliWindows / Linux: download and install your package from the okta-aws-cli releases page.
Step 2: Run the login command
|
There is an open bug in |
| AWS Account | Team | Login Command |
|---|---|---|
Any |
ace-infra / ddc-infra |
|
gred-ace-prod |
Everyone else |
|
gred-ace-rcp-sandbox |
Everyone else |
|
gred-ddc-dev |
Everyone else |
|
|
Optional: add shortcuts to your shell profile
Add a helper function to your shell config file (~/.zshrc for Zsh, or ~/.bashrc / ~/.bash_profile for Bash):
okta() {
    case "$1" in
        prod)
            command okta-aws-cli --org-domain sso.gred.ai --oidc-client-id 0oa4vvf7jiRANlzS8697 --aws-acct-fed-app-id 0oa4bf9jybXEp85Am697 --session-duration 43200 -bz "${@:2}"
            ;;
        sandbox)
            command okta-aws-cli --org-domain sso.gred.ai --oidc-client-id 0oa4vvf7jiRANlzS8697 --aws-acct-fed-app-id 0oa8t6wvne8COYrxn697 --session-duration 43200 -bz "${@:2}"
            ;;
        dev)
            command okta-aws-cli --org-domain sso.gred.ai --oidc-client-id 0oa4vvf7jiRANlzS8697 --aws-acct-fed-app-id 0oa6kmwy9zWN9GEBf697 --session-duration 43200 -bz "${@:2}"
            ;;
        *)
            command okta-aws-cli "$@"
            ;;
    esac
}
Reload the file with source ~/.zshrc (or your modified config file). You can then connect using a short command:
| AWS Account | Command |
|---|---|
gred-ace-prod |
|
gred-ace-rcp-sandbox |
|
gred-ddc-dev |
|
Step 3: Log in using your SSO credentials
After logging in, follow the prompts to return to your terminal, where you will be asked to select your desired AWS account.
|
Due to the bug mentioned above, only Okta admins are prompted to select an account. Other users select their account via the |

Step 4: Confirm access
Confirm that you have active credentials by running:
aws sts get-caller-identityIf this succeeds, you are ready to run the registration scripts. See Dataset Registration.
Optional: install the Okta browser plugin
For added convenience, Okta provides a browser plugin with a dropdown list of your authorized applications. See the Okta browser plugin documentation for installation instructions.